Introduction
Here is a simple test: picture yourself approaching a speed bump in a school zone at 40 km/h ‚ÄĒ the posted speed limit on the street. The bump is low-profile and you have driven this road before. What do you do?
If the answer is ‘keep going at 40’, you may be about to give your suspension a jarring lesson it will not forget quickly. Hitting a speed bump at full advisory speed ‚ÄĒ even when that speed is modest ‚ÄĒ can cause real wear on your vehicle, jolt your passengers, and chip away at the calm, smooth driving technique that NSW driving examiners look for at test time.
Speed bumps, raised crossings, valley gutters, potholes, and uneven road seams are features of everyday suburban driving throughout Sydney. In areas like Mascot, Botany, Rosebery, Maroubra, and Randwick ‚ÄĒ the primary teaching grounds for Driven to Drive Driving School ‚ÄĒ these surfaces are a regular part of lesson routes. Understanding how to handle them correctly is not just about protecting your car; it is a core element of smooth, confident, examiner-ready driving.
This guide covers technique, approach speed, vehicle awareness, and the common errors that learner drivers and new P-platers make when they encounter uneven road features for the first time. At Driven to Drive, Andrew and the team have spent over 11 years helping learners navigate exactly these real-world conditions with confidence.
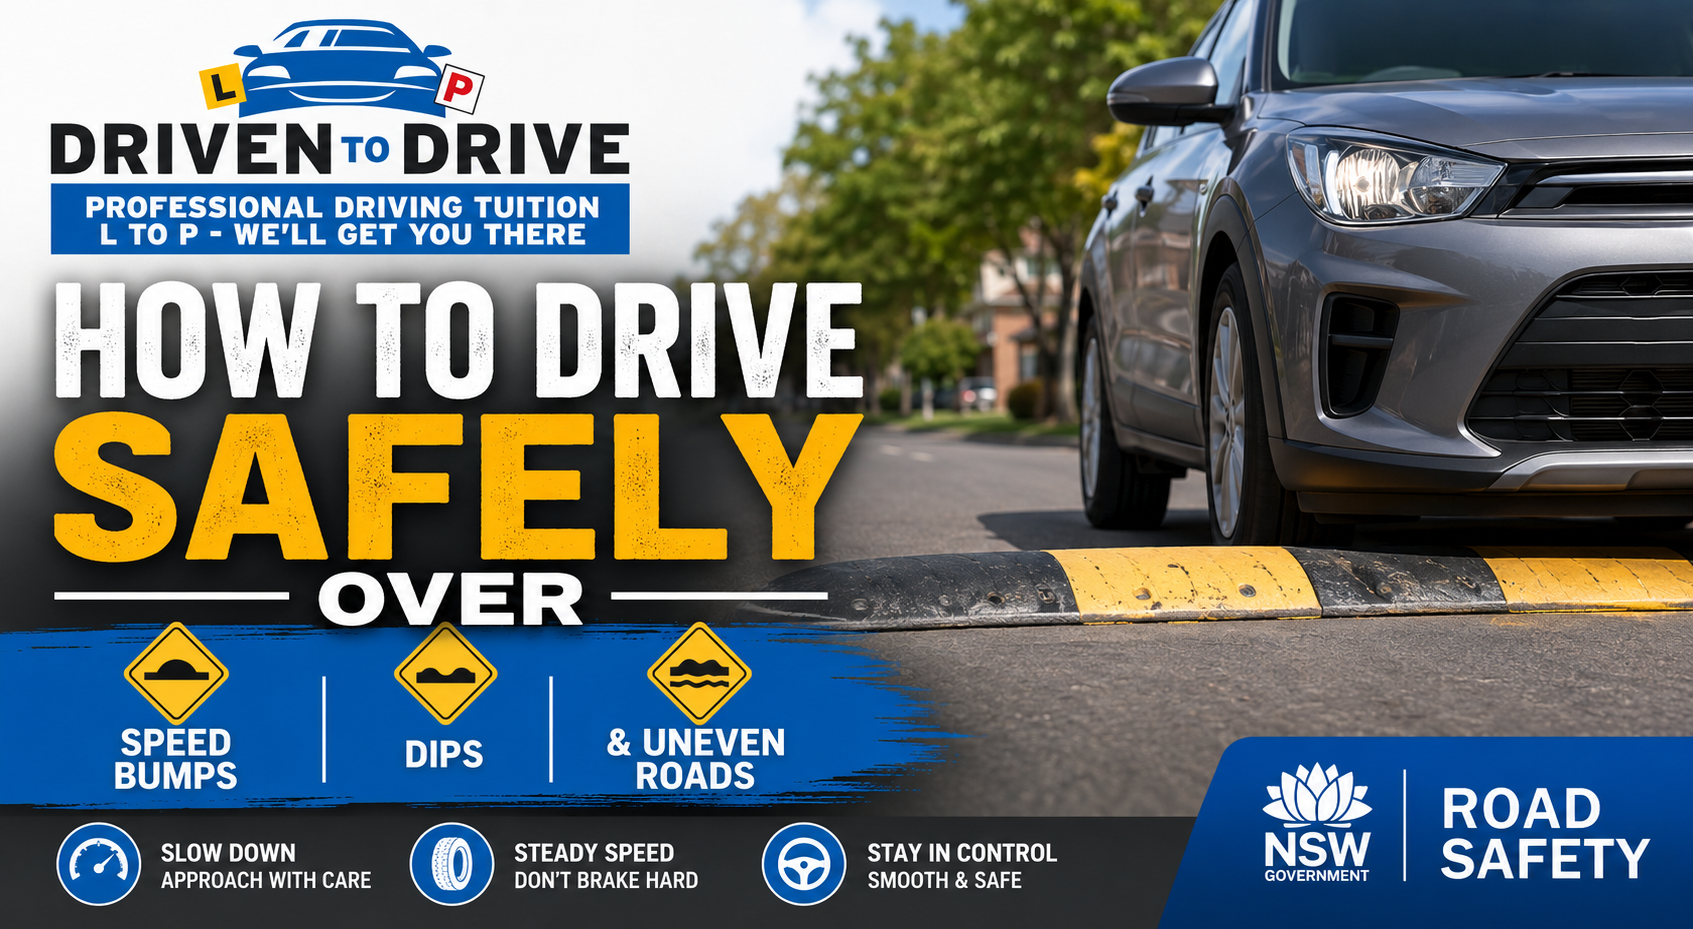
Types of Road Features You Will Encounter
Not all bumps and surface changes are the same. Understanding what you are approaching changes how you respond:
Speed Humps (Rounded Bumps)
The most common type ‚ÄĒ a rounded mound across the full width of the lane. Found in residential streets, school zones, carparks, and hospital precincts. Height and gradient vary; some are gentle, others steep. The ‘Speed Hump Ahead’ sign is an advisory warning, not a speed limit sign ‚ÄĒ it tells you the feature is coming, but your responsibility is to approach at a safe speed regardless.
Speed Cushions (Split Humps)
These are raised sections that do not span the full lane width ‚ÄĒ they leave gaps on either side. Emergency vehicles can straddle them without slowing. For a standard car, the technique is the same as a speed hump: slow before, not on the feature. If your vehicle is wide enough to straddle the cushions as an emergency vehicle does, do not attempt this during your learner period without instructor guidance.
Raised Pedestrian Crossings
A flat-topped raised section ‚ÄĒ effectively a plateau in the road ‚ÄĒ with steep entry and exit ramps. Common near schools and in high-pedestrian areas across inner Sydney. These require you to slow progressively before the ramp, traverse the flat section at low speed, and exit smoothly. Pedestrians have right of way at marked crossings, and your attention must shift to scanning for pedestrians as you approach.
Dips, Valley Gutters, and Driveways
A valley gutter is a shallow concrete channel crossing the road at driveways or side streets ‚ÄĒ common in older Sydney suburbs including parts of Botany and Rosebery. Low-clearance vehicles are particularly vulnerable. The correct approach: reduce speed before the dip, never in it, and approach steep-angle driveways on a slight diagonal to reduce the risk of grounding the vehicle’s underside.
Potholes
Potholes are irregular, often deep depressions in the road surface caused by water ingress and traffic wear ‚ÄĒ particularly prevalent in Sydney after heavy rain events. They can appear suddenly and without warning. Unlike a speed bump, you may not always have time to stop; the correct response requires looking further ahead and knowing when you simply cannot avoid one.
Road Seams, Railway Tracks, and Tram Lines
Joints in the road surface between lanes or at intersections, railway level crossings, and tram tracks (notably along the Randwick light rail corridor, familiar territory for Driven to Drive learners) all demand a specific approach ‚ÄĒ particularly relevant to cyclists and motorcyclists, but applicable to all drivers.
The Correct Technique for Speed Humps
The technique for navigating a speed hump safely is straightforward once you know it ‚ÄĒ and it becomes instinctive with practice:
- Approach straight. Do not angle across the hump diagonally, which puts asymmetrical load on your suspension and tyres. Align your vehicle squarely with the hump before you reach it.
- Brake before the hump, not on it. Reduce your speed while you still have clear road in front of the feature. A typical residential speed hump should be crossed at approximately 5‚Äď10 km/h; a gentle low-profile hump may allow slightly more. When in doubt, slower is always correct.
- Release the brake just before the hump. As your front wheels begin to climb, ease off the brake. Braking on the hump itself compresses the front suspension downward into the surface, increasing the impact on your vehicle.
- Do not accelerate until both axles have cleared. Wait until your rear wheels have passed completely over the hump before applying power again. Accelerating mid-hump causes the rear to lift unevenly.
- Keep your grip on the wheel firm but relaxed. The hump will produce minor steering feedback ‚ÄĒ hold the wheel firmly to maintain your straight line.
| ūüí°¬† Instructor Note from Driven to Drive
Examiners during the NSW driving test notice abrupt, harsh inputs ‚ÄĒ heavy braking, jerky acceleration, sharp steering. A smooth speed hump crossing demonstrates the kind of progressive, vehicle-aware technique they are looking for. Practise it on lesson routes through Mascot, Botany, and Maroubra until it is second nature. |
Handling Dips, Valley Gutters, and Steep Driveways
Dips require a different approach from humps. While a hump compresses your suspension, a dip stretches it ‚ÄĒ and then compresses sharply at the base. The physics work against you if you carry speed into a dip:
- Slow down before the dip, not inside it. Braking while your front axle is descending into a valley gutter shifts weight forward onto the already-compressed front suspension, reducing your ability to steer or stop effectively.
- For steep driveway entries and exits: approach on a slight diagonal (roughly 30‚Äď45 degrees) to allow each wheel to cross the angle change sequentially, rather than the full front or rear axle hitting at once. This is especially important for vehicles with lower ground clearance.
- Check for pedestrians. At driveway crossings ‚ÄĒ particularly near schools, shopping strips, and residential streets in Rosebery and Eastlakes ‚ÄĒ pedestrians and cyclists may be crossing exactly where your attention is on the road surface. Look up before you enter.
- If your vehicle bottoms out (makes contact between the undercarriage and the ground), stop safely and check for damage before continuing. Low-clearance vehicles may need to avoid particularly steep driveway angles entirely.
Potholes: Spotting, Responding, and Reporting
Potholes are unpredictable and unavoidable in some parts of Sydney, particularly after heavy rain. The correct approach has three elements: anticipation, response, and follow-up.
Anticipation
The best defence against potholes is looking further ahead ‚ÄĒ a habit Driven to Drive instructors actively teach. Fix your scanning distance at least 8‚Äď12 seconds ahead of your vehicle, not just a few metres in front of the bonnet. This gives you time to identify a pothole and respond calmly.
Response
If you have sufficient time and it is safe to do so, adjust your lane position slightly to avoid the pothole ‚ÄĒ checking your mirrors and blind spots before any lateral movement. If you cannot avoid it:
- Ease off the brake just before impact. A wheel rolling over a pothole absorbs impact better than a locked or heavily braked wheel. Do not, however, accelerate into it.
- Hold the steering wheel firmly. Potholes can produce sudden feedback through the wheel ‚ÄĒ maintain your grip without fighting the wheel aggressively.
- Check for damage afterwards. If the impact was significant, find a safe place to stop and inspect your tyres for cuts or bulging sidewalls. Listen for unusual vibration, pulling to one side, or changes in steering feel before continuing at speed.
Reporting and Compensation
If a pothole causes damage to your vehicle, you may be able to lodge a claim with the relevant local council or Transport for NSW, depending on whose road it falls on. Keep records of where and when the incident occurred, take photos if it is safe to do so, and contact the responsible authority promptly. Roads and Maritime Services (part of Transport for NSW) manages state roads; local councils manage suburban streets.
Railway Crossings, Tram Tracks, and Road Seams
For learner drivers in the Randwick corridor ‚ÄĒ where the CBD and South East Light Rail operates along Anzac Parade and surrounding streets ‚ÄĒ tram tracks are a genuine and regular road feature. The same principles apply to railway level crossings:
- Approach at as close to a right angle as road geometry allows. Tracks that run diagonally across your path at a shallow angle are more likely to cause a tyre to catch or slip, particularly for cyclists and motorcyclists.
- Smooth, steady inputs only. Do not brake sharply on the tracks themselves. Reduce your speed before reaching the crossing and traverse at consistent, low speed.
- Never stop on a railway crossing. This is a statutory rule under the Road Rules 2014 (NSW). If traffic ahead is stationary or congested, wait before the crossing until you are certain there is sufficient space to clear it completely.
- For tram tracks: be alert to trams approaching from behind or from a side route. Trams have absolute right of way at intersections and cannot swerve or stop suddenly. Check carefully in both directions before crossing tram lines, especially at intersections where tram movements may not be immediately obvious.
- Road seams and lane joints: these are lower-risk for cars than for motorcycles, but may cause brief instability at speed or in wet conditions. Crossing them straight (not at an angle) is best practice.
Real-World Scenarios: South Eastern Sydney Roads
The following scenarios reflect situations that learner drivers regularly encounter during lessons and on test routes in Mascot, Maroubra, Botany, Randwick, and surrounds.
| Scenario 1: Speed hump in a Mascot residential street
Situation: You are driving along a quiet residential street in Mascot at 40 km/h. A ‘Speed Hump Ahead’ sign appears. You are approaching the hump with a parked car on the left limiting your view. NSW Rule: Road Rules 2014 (NSW): You must drive at a speed that is safe for the conditions ‚ÄĒ including road features. Advisory signage does not override this obligation. Approach:
|
| Scenario 2: Raised pedestrian crossing near a Rosebery school zone
Situation: You are approaching a raised pedestrian crossing outside a primary school in Rosebery during morning drop-off. Children and parents are moving on both footpaths. The crossing has steep entry and exit ramps. NSW Rule: Road Rules 2014 (NSW), Rule 65: Drivers must give way to pedestrians at marked crossings. School zone speed limits apply (typically 40 km/h ‚ÄĒ and your speed on the ramp should be well below this). Approach:
|
| Scenario 3: Valley gutter at a steep driveway in Botany
Situation: You are driving into a commercial driveway in Botany that drops sharply from the road to the driveway surface. Your vehicle has standard ground clearance. The angle is steep. NSW Rule: NSW Road Rules require you to give way to pedestrians crossing at the driveway and to drive safely for the conditions ‚ÄĒ including the road surface. There is no advisory signage for private driveway gradients. Approach:
|
| Scenario 4: Pothole on a wet Maroubra road after heavy rain
Situation: You are driving along a suburban road in Maroubra the day after heavy rain. There are several water-filled depressions in the road. One is directly in your path with insufficient distance to stop. NSW Rule: Road Rules 2014 (NSW): You must maintain a safe following distance and drive at a speed that allows you to respond to road hazards. A water-filled pothole conceals its true depth. Approach:
|
| Scenario 5: Light rail tracks on Anzac Parade, Randwick
Situation: You are driving south on Anzac Parade near the University of NSW. You are changing lanes across light rail tracks that run in the median. Your indicator is on and you are beginning the lane change when you notice the tracks. NSW Rule: Road Rules 2014 (NSW): Trams have right of way in dedicated corridors. You must not stop on the tracks. The tracks cross your path at a shallow angle during the lane change. Approach:
|
Common Mistakes ‚ÄĒ and How to Avoid Them
Andrew at Driven to Drive observes these errors regularly with learner drivers encountering uneven road features for the first time:
- Braking on the speed hump, not before it.
      Braking while your front wheels are on the hump compresses the suspension downward into the feature, causing harder impact. Brake to your approach speed before the hump, then ease off as you mount it.
- Angling across a speed hump to avoid an obstacle.
      Crossing a hump diagonally places the full weight on one side of your vehicle, stressing one tyre, rim, and suspension arm while the other side clears. Always align straight before crossing.
- Accelerating mid-hump or mid-dip.
      Accelerating before both axles are clear causes the rear suspension to compress unevenly into the feature on exit. Wait until your rear wheels are fully past the hump before applying power.
- Ignoring the ‘Speed Hump Ahead’ sign and maintaining speed.
¬†¬†¬†¬†¬†¬†The sign is an advance warning ‚ÄĒ not permission to pass at 40 km/h. There is no posted speed for a hump approach. You must choose a safe speed for the surface, which is typically well below the street speed limit.
- Not scanning far enough ahead to spot potholes in time.
¬†¬†¬†¬†¬†¬†Fixating on the area immediately in front of the bonnet is the most common learner scanning error. Extend your view to 8‚Äď12 seconds ahead and you will almost always have time to identify and respond to road surface hazards.
- Stopping on a railway or tram crossing.
      This is both dangerous and illegal under NSW Road Rules 2014. Never enter a level crossing or tram crossing unless you are certain there is space on the other side to clear it completely before stopping.
The Safer Drivers Course: Developing Vehicle Awareness and Road Reading
One of the key skills developed through the NSW Safer Drivers Course is the ability to read the road ahead ‚ÄĒ not just for other vehicles, but for surface changes, hazards, and features that demand a change in speed or approach. This skill directly applies to everything covered in this guide.
The Safer Drivers Course is available to learner drivers who have completed at least 50 logbook hours. It includes:
- Hazard perception and early identification of road features and risks
- Safe decision-making under real driving conditions
- Managing distraction and cognitive load while monitoring road surfaces
- Understanding vehicle dynamics and the impact of road conditions on control
Completing the course earns 20 bonus logbook hours toward the mandatory 120-hour requirement ‚ÄĒ a significant practical benefit for learners working toward their P1 licence test.
Andrew is a certified Safer Drivers Course Facilitator. He delivers the program in a structured, calm, and supportive environment, drawing on 11+ years of experience teaching on Sydney’s South Eastern suburban roads ‚ÄĒ the same roads where these surface features appear every day.
| ‚úÖ¬† Safer Drivers Course ‚ÄĒ At a Glance
Eligible: Learner drivers with 50+ logbook hours completed Logbook credit: 20 bonus hours toward 120-hour requirement Duration: Approx. 6 hours (classroom and on-road modules) Facilitator: Andrew ‚ÄĒ certified NSW Safer Drivers Course Facilitator Location: Mascot, NSW 2020 Bookings: driventodrive.com.au | 0416 321 572 |
Penalties and Demerit Points
NSW learner drivers hold a maximum of four demerit points. Exceeding this total through any combination of infringements during the learner licence period results in a minimum three-month suspension ‚ÄĒ a significant setback for any learner working toward their P1 test.
While road surface technique itself is not directly penalised, the behaviours it relates to ‚ÄĒ following distance, safe speed for conditions, stopping on railway crossings ‚ÄĒ carry demerit points and fines. Specifically:
- Stopping on a railway crossing is an offence under the Road Rules 2014 (NSW) and carries demerit points
- Failing to give way to pedestrians at a marked crossing carries demerit points
- Driving at a speed unsafe for road conditions (regardless of the posted limit) may be penalised
Penalty amounts vary by offence and are subject to change. Always check with Service NSW (service.nsw.gov.au) for current fine details. Do not rely on unofficial sources.
Expert Tips from Driven to Drive Instructors
These are the instructor-backed habits that Andrew reinforces on every lesson where uneven roads are involved:
- Extend your scanning distance to 8‚Äď12 seconds ahead of your vehicle at all times. In urban environments at 40‚Äď50 km/h, this translates to roughly 90‚Äď140 metres. At this distance, you can identify a speed hump, pothole, or valley gutter and respond calmly ‚ÄĒ not reactively.
- Separate braking from surface crossing. Brake to your approach speed on clear road, then release before you reach the feature. Combining braking with crossing a bump, dip, or railway crossing adds unnecessary stress to your vehicle and reduces steering precision.
- Check mirrors before and after any speed reduction. Slowing for a road feature is a braking event ‚ÄĒ following drivers need to know it is happening. A mirror check before braking and after you resume speed is good professional driving habit.
- Practise narrating your approach aloud during learner sessions. Saying ‘speed hump ahead ‚ÄĒ braking now, approaching straight, releasing brake, crossing, clear’ keeps both you and your supervising driver aligned on the process. This technique also builds the internal commentary habits that support hazard perception on your driving test.
- After any significant road surface impact, check your vehicle before continuing at speed. A brief roadside inspection of tyres takes sixty seconds and can prevent a blowout kilometres later. It is a habit that experienced drivers build early and maintain throughout their driving life.
Official NSW Government References
All road rules referenced in this blog are drawn from official NSW Government sources. Always consult these directly for current and authoritative information:
- Transport for NSW ‚ÄĒ Learner Driver Resources
- Service NSW ‚ÄĒ Getting Your P1 Provisional Licence
- NSW Road User Handbook (PDF ‚ÄĒ Transport for NSW)
- NSW Safer Drivers Course ‚ÄĒ Official Information
- NSW Centre for Road Safety
- Report a Road Issue ‚ÄĒ Transport for NSW
Ready to Drive on Real Sydney Roads with Confidence?
| Ready to become a safe, confident driver? Book your lessons with Driven to Drive ‚ÄĒ South Eastern Sydney’s trusted driving school for over 11 years.
Our lessons cover real suburban roads ‚ÄĒ speed humps, valley gutters, school zones, tram tracks, and everything in between. You will learn to handle every surface feature calmly and correctly from your very first lesson. Join our Safer Drivers Course in Mascot and earn 20 logbook hours while building the road-reading skills to drive safely for life. ūüď쬆 0416 321 572 ‚úČÔłŹ ¬† driventodrive@outlook.com ūüĆź¬† driventodrive.com.au |
Related reading on the Driven to Drive blog:
- Parking Like a Pro: A Step-by-Step Guide for NSW Learners
- Sydney’s Hidden Driving Gems: Best Practice Routes for Learners
- Defensive Driving: Building Lifelong Safe Habits on NSW Roads
Disclaimer
This blog provides general driving information for educational purposes only. It is not legal advice. Road rules, penalties, and fine amounts may change. Always refer to official NSW Government sources ‚ÄĒ including Transport for NSW, Service NSW, and the NSW Centre for Road Safety ‚ÄĒ for the most current and authoritative information. All content should undergo human review by a qualified road safety expert before final publication. Driven to Drive Driving School accepts no liability for decisions made based on information contained in this post.


